

What is Transport?
Transport helps students weigh up the price of a vehicle against what it really costs to run. Every week, each student pays for how they get around:
Public transport: every student starts here and pays the classroom's public transport cost each week ($15 by default).
Bikes, scooters and boards: these give the student a discount on public transport. For example, a Bicycle takes 75% off.
Motorbikes and cars: these replace public transport completely. The student pays the vehicle's weekly running cost instead.
The weekly cost comes out of the student's Everyday account automatically on bill day, and shows in the Bills card on their home screen.
Turn on Transport
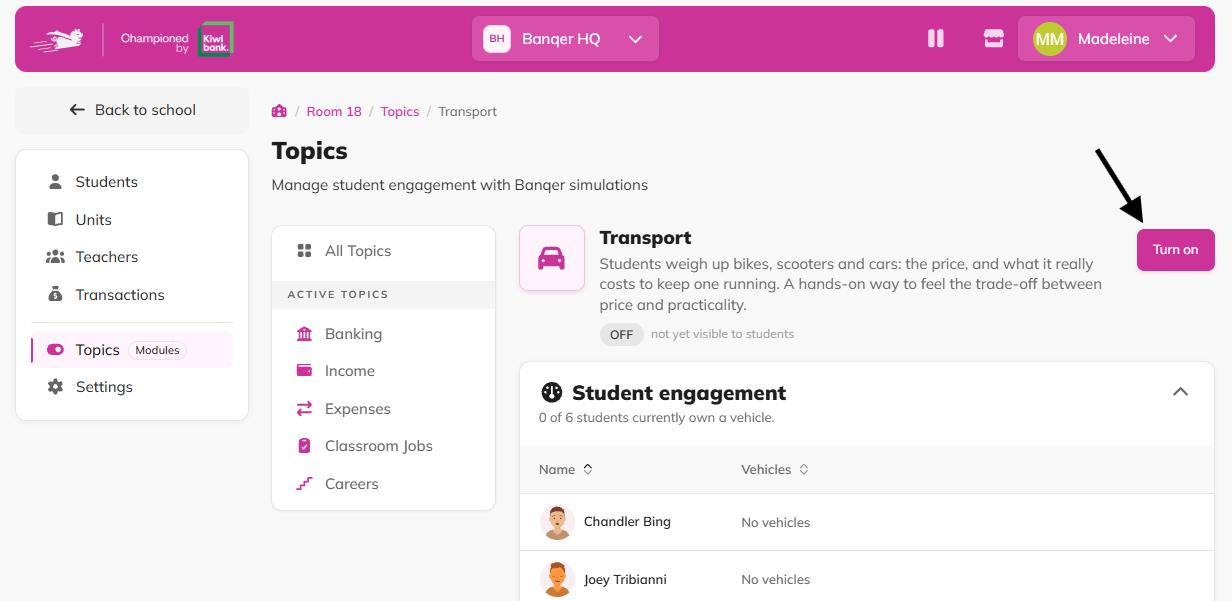
Click Topics in the sidebar and open Transport.
Click the Turn on button, then confirm.
When you turn it on:
Every student starts paying the public transport cost each week, from the next bill day. Students who join later are included too.
A Transport section appears in the Marketplace, where students can buy vehicles from Banqer Motors.
Set the public transport cost
On the Transport topic page, open the Settings section (at the bottom).
Set the Base public transport cost, the amount each student pays per week when they're not using a vehicle of their own. Set it to $0 for free public transport.
Click Save changes.
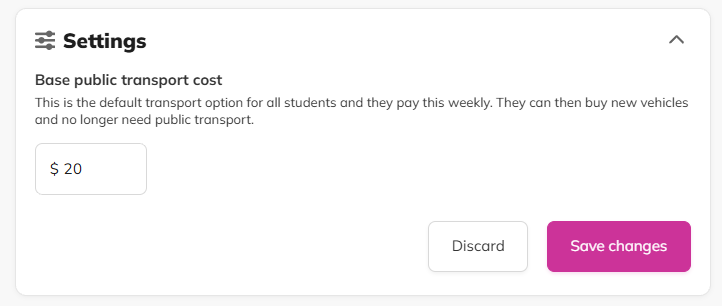
The new cost applies from the next bill day.
Choose which vehicles are for sale
The Vehicles for sale table on the topic page lists every vehicle, with its price and weekly running costs.
Use the Show to students switch on each row to choose which vehicles students can see and buy.
There is a set of default vehicles ready to go. The ones marked "Hidden" are switched off at the start, and you can show them to students whenever you like.
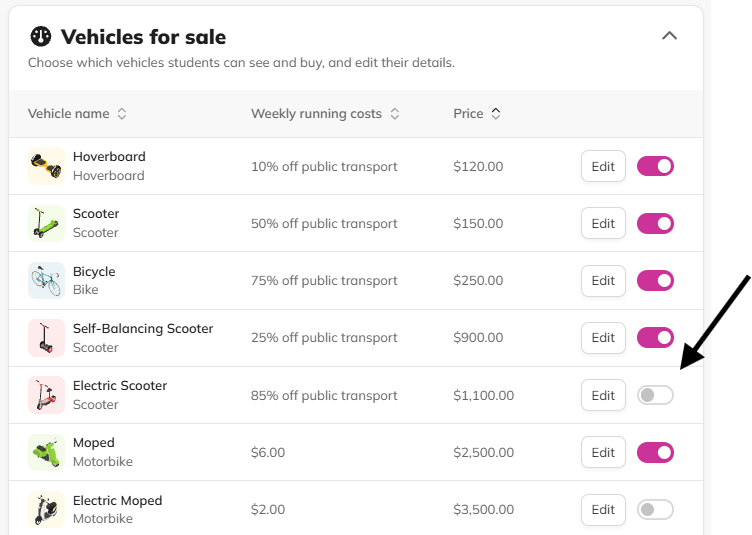
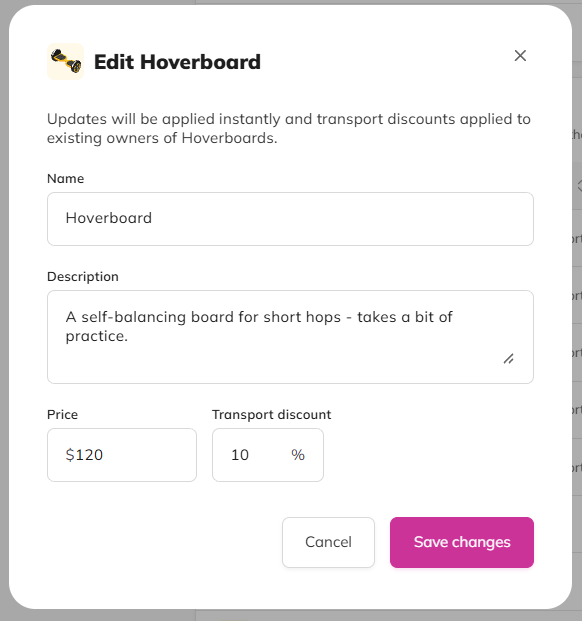
To change a vehicle, click Edit. You can change its Name, Description and Price, plus either its Weekly running costs (motorbikes and cars) or its Transport discount (bikes, scooters and boards).
Click Save changes.
How students buy a vehicle
Open the Marketplace and go to the Transport section. Students can also click Check out transport on their Bills card.
Browse All vehicles and compare prices and weekly costs.
Choose a vehicle and buy it.
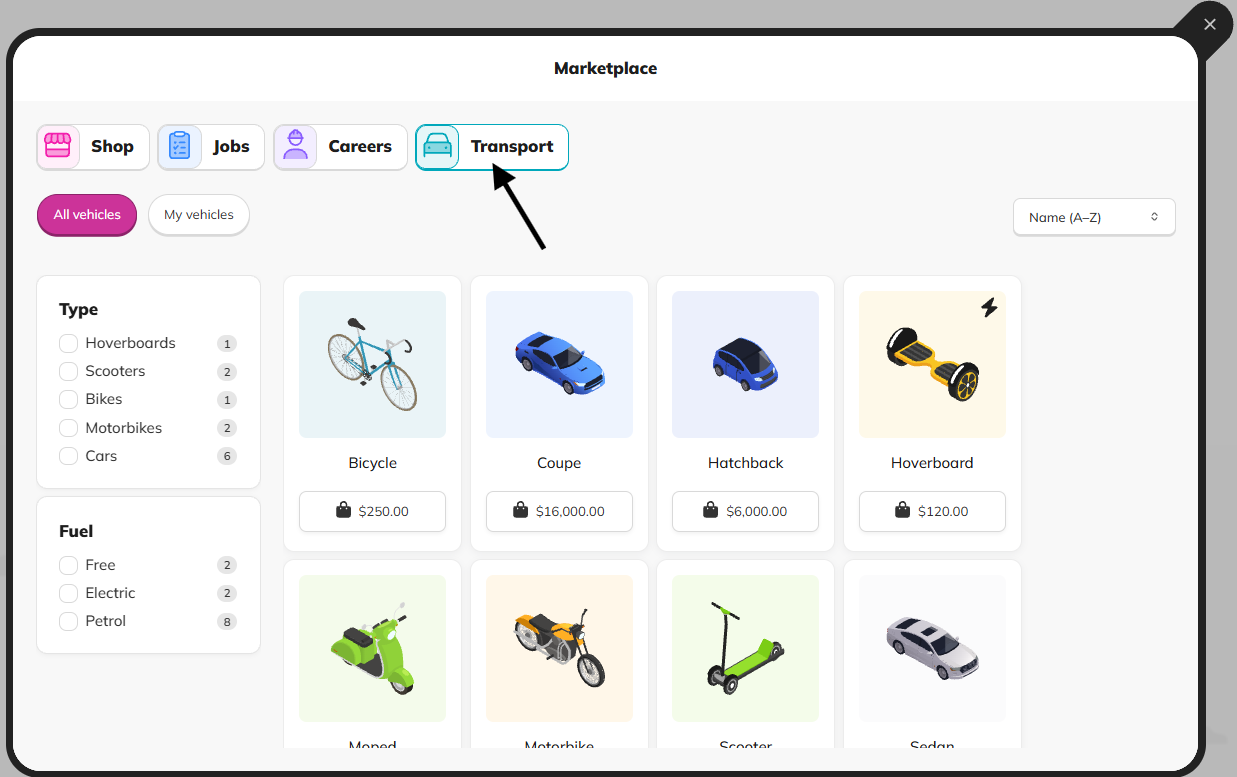
A student's first vehicle goes straight into use, so their weekly cost changes from the next bill day.
How students switch vehicles
Students can own several vehicles and choose which one they use.
Open My vehicles in the Transport section of the Marketplace (or click Manage on the vehicle in their Bills card).
Choose a vehicle and click Use this, or click Stop using to go back to public transport.
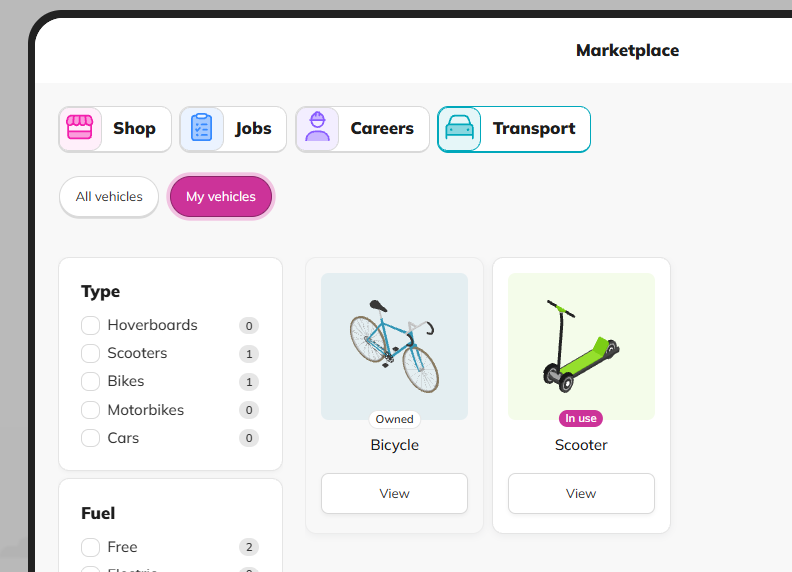
Their weekly cost follows whichever vehicle is in use.
See how your students are doing
The Student engagement table on the topic page shows the vehicles each student owns and which one they're using. It also shows how many students own a vehicle. You can sort by name or number of vehicles.
Flags
Transport works on its own or with Expenses. The weekly transport cost shows alongside any other bills in the student's Bills card.
Only the vehicle in use counts. Students can collect vehicles and switch between them to find the best deal.
Students cannot earn private driving income from owning any type of vehicle.
Tips
Ask students to work out how many weeks it takes for a bike to pay for itself compared with public transport.
Start with the cheaper vehicles shown, then show the bigger ones once students are earning more.
Adjust the public transport cost to match your class's wages, so the choice between bus, bike and car feels real.
Electric vehicles are cheap to run. Showing the Electric Car next to the petrol cars makes a great comparison of up-front price against running costs.